Build a 3D Wooden Blossom Cart Puzzle Kit (DIY Decor)
3D Wooden Blossom Cart Puzzle Kit – A Decorative Build for Relaxing, Screen-Free Craft Time
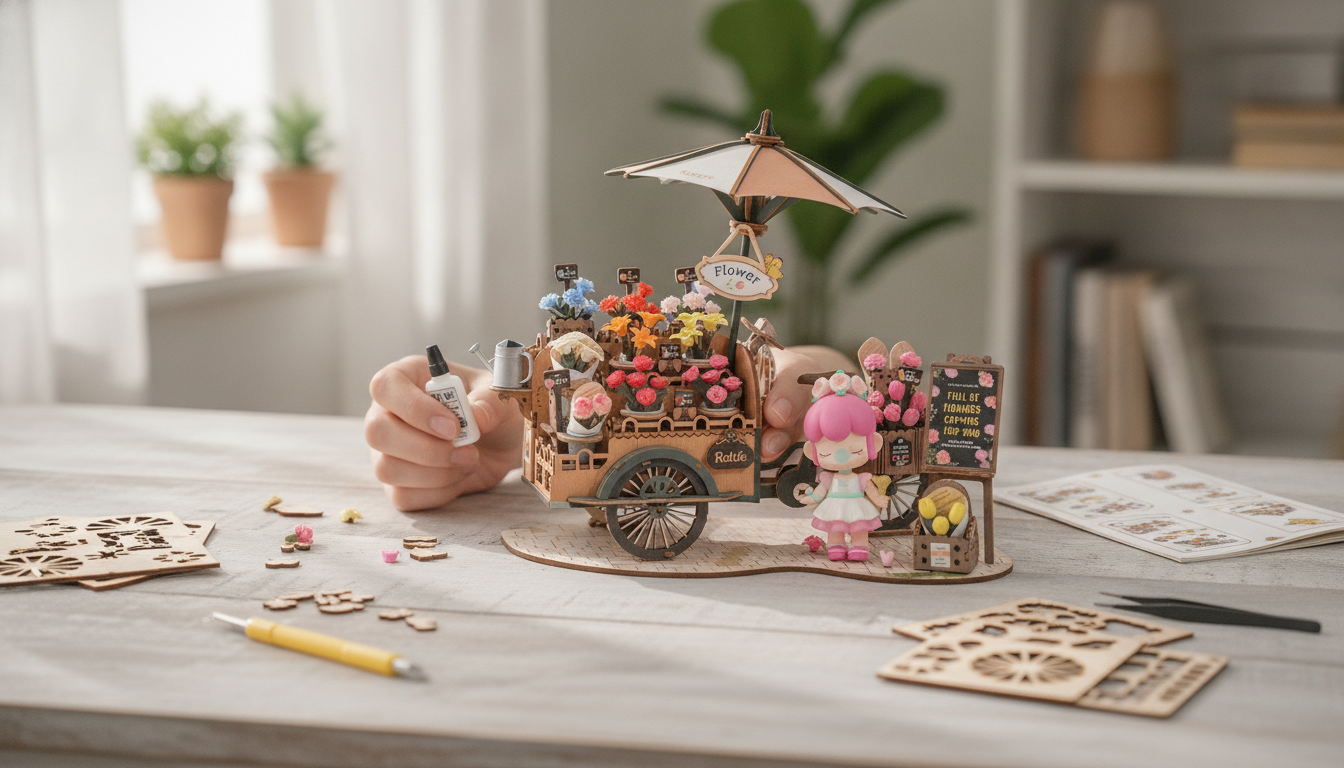
A 3D wooden puzzle kit that becomes a charming blossom cart display piece combines hands-on building with a satisfying final result. The process is part puzzle-solving, part miniature model-making: you work through a sequence, align tabs and slots, and gradually watch the cart take shape. Below is what to expect in the box, how assembly typically goes, and a few practical ways to get a cleaner finish and a longer-lasting display.
What the Blossom Cart Build Feels Like
This style of kit is all about steady progress. You’ll match pre-cut pieces, follow a step-by-step order, and build subassemblies that later come together into a cohesive little cart scene. It’s satisfying because the shape becomes recognizable early—then the detail work (wheels, handle, decorative blossom elements) brings it to life.
- A balance of puzzle-solving and model-making: aligning pieces, following a sequence, and watching the cart shape emerge.
- Best suited to patient builders who enjoy small parts, repeated steps, and detail work.
- A relaxing, screen-free activity for teens and adults that can be done solo or as a shared project.
- The finished cart works as desk, shelf, or bedside decor—especially in cozy, craft-forward spaces.
If you like activities where precision matters more than speed, this is the kind of project that feels calming rather than competitive.
What’s Included and What to Prepare
Most wooden 3D puzzle kits come with pre-cut wooden sheets and a printed instruction booklet that guides you through the build in a specific order. Following the sequence closely helps prevent the most common frustration: realizing a later piece blocks access to a step you skipped.
- Pre-cut wooden pieces designed to be assembled into a 3D blossom cart model.
- Step-by-step instructions (follow the order closely to avoid backtracking).
- A flat, well-lit workspace helps prevent lost parts and misalignment.
- Common helpful extras: craft knife for clean tabs, tweezers for small components, fine sandpaper for edges, wood glue (if the kit allows/benefits from it).
Quick Prep Checklist
| Item | Why it helps | Optional or recommended |
|---|---|---|
| Bright desk lamp | Makes small details and numbering easier to see | Recommended |
| Fine sandpaper (400–800 grit) | Smooths tight joints and sharp edges | Recommended |
| Tweezers | Places tiny parts without bending them | Optional |
| Craft knife | Trims tabs or removes small burrs | Optional |
| Wood glue | Adds long-term strength on stress points (axles/joints) | Optional (follow kit guidance) |
For best comfort and control, work on a hard surface (not a soft couch cushion) and keep a small tray or bowl nearby to hold tiny parts between steps.
Assembly Tips for a Cleaner, Sturdier Result
A few small habits make a big difference in how neat the finished model looks—especially around joints, edges, and delicate connectors.
- Dry-fit first: Test how pieces seat before applying pressure or glue. If something feels forced, pause and re-check orientation.
- Sand lightly, not aggressively: A couple of passes is usually enough to remove fuzz or burrs. Over-sanding can loosen the fit and reduce stability.
- Keep parts organized: Sort by step number or by subassembly (wheels, cart body, handle, blossom elements). This prevents mixing similar-looking pieces.
- Use gentle, even pressure: Press tabs in slowly and evenly to reduce the chance of splintering thin sections.
- If glue is used, apply sparingly: A toothpick helps place tiny dots of glue. Wipe excess right away to avoid shiny residue on visible surfaces.
Wood is naturally variable in grain and stiffness, so if one joint feels tighter than another, that’s normal. For a deeper look at wood behavior and stability, the USDA’s reference guide is a helpful resource: Wood Handbook: Wood as an Engineering Material (USDA Forest Service).
If you do any sanding, it’s also worth reading basic safety guidance on wood dust exposure and cleanup: Woodworking and Wood Dust (NIOSH).
Timing, Difficulty, and Who It’s For
This is a strong pick for teens and adults who like careful projects with a decorative payoff. The “difficulty” usually isn’t about strength—it’s about precision. Small misalignments can ripple into later steps, so it rewards patience and steady hands.
Styling and Display Ideas Once It’s Built
Product Snapshot
If you’re ready to start building, the 3D Wooden Blossom Cart Puzzle Kit is a build-and-display project that fits neatly into home office decor, bedroom shelving, or a craft room vignette.
At-a-Glance Details
| Detail | Value |
|---|---|
| Price | $32.51 USD |
| Availability | In stock |
| Product page | View listing |
More In-Stock Picks for Your Setup
- 24 Inch FHD Gaming Monitor with 165Hz Refresh Rate and AMD FreeSync Technology for a crisp display when you do want to pull up reference images or unwind after crafting.
- Baby Girls Cute Sleeveless Cotton Bodysuit if you’re shopping for family essentials while you browse.
FAQ
Is this kit better for beginners or experienced builders?
Patient beginners can enjoy it if they follow the steps carefully and take their time with alignments. Experienced builders tend to appreciate the detail work and get the cleanest results by dry-fitting first, sanding lightly, and taking short breaks during repetitive steps.
Do you need glue to assemble the blossom cart?
Some wooden puzzle kits are designed to be press-fit, so glue may not be required. If the instructions allow it, a tiny amount of wood glue can help reinforce high-stress joints like axles or load-bearing connectors.
How can the finished model be kept looking nice over time?
Keep it out of direct sunlight and high humidity, and handle it by sturdier sections rather than delicate details. A soft brush or gentle dusting tool helps remove dust without snagging small parts.


Leave a comment